Welcome!

Welcome to SouthwestTrakers blog. We are dedicated to sharing N-Scale model railroading through the use of T-Trak modules. We are in Lubbock, Texas, USA and currently number 7 modelers, well over 50 presentable modules, with over 24 modules cut out and in some stage of becoming presentable.

Friday, September 26, 2014

My shop on 9/23/2014

I decided to take a few photos of my shop weekly just to track my projects and progress (if any) I'm making on them.

I have three projects going on right now.

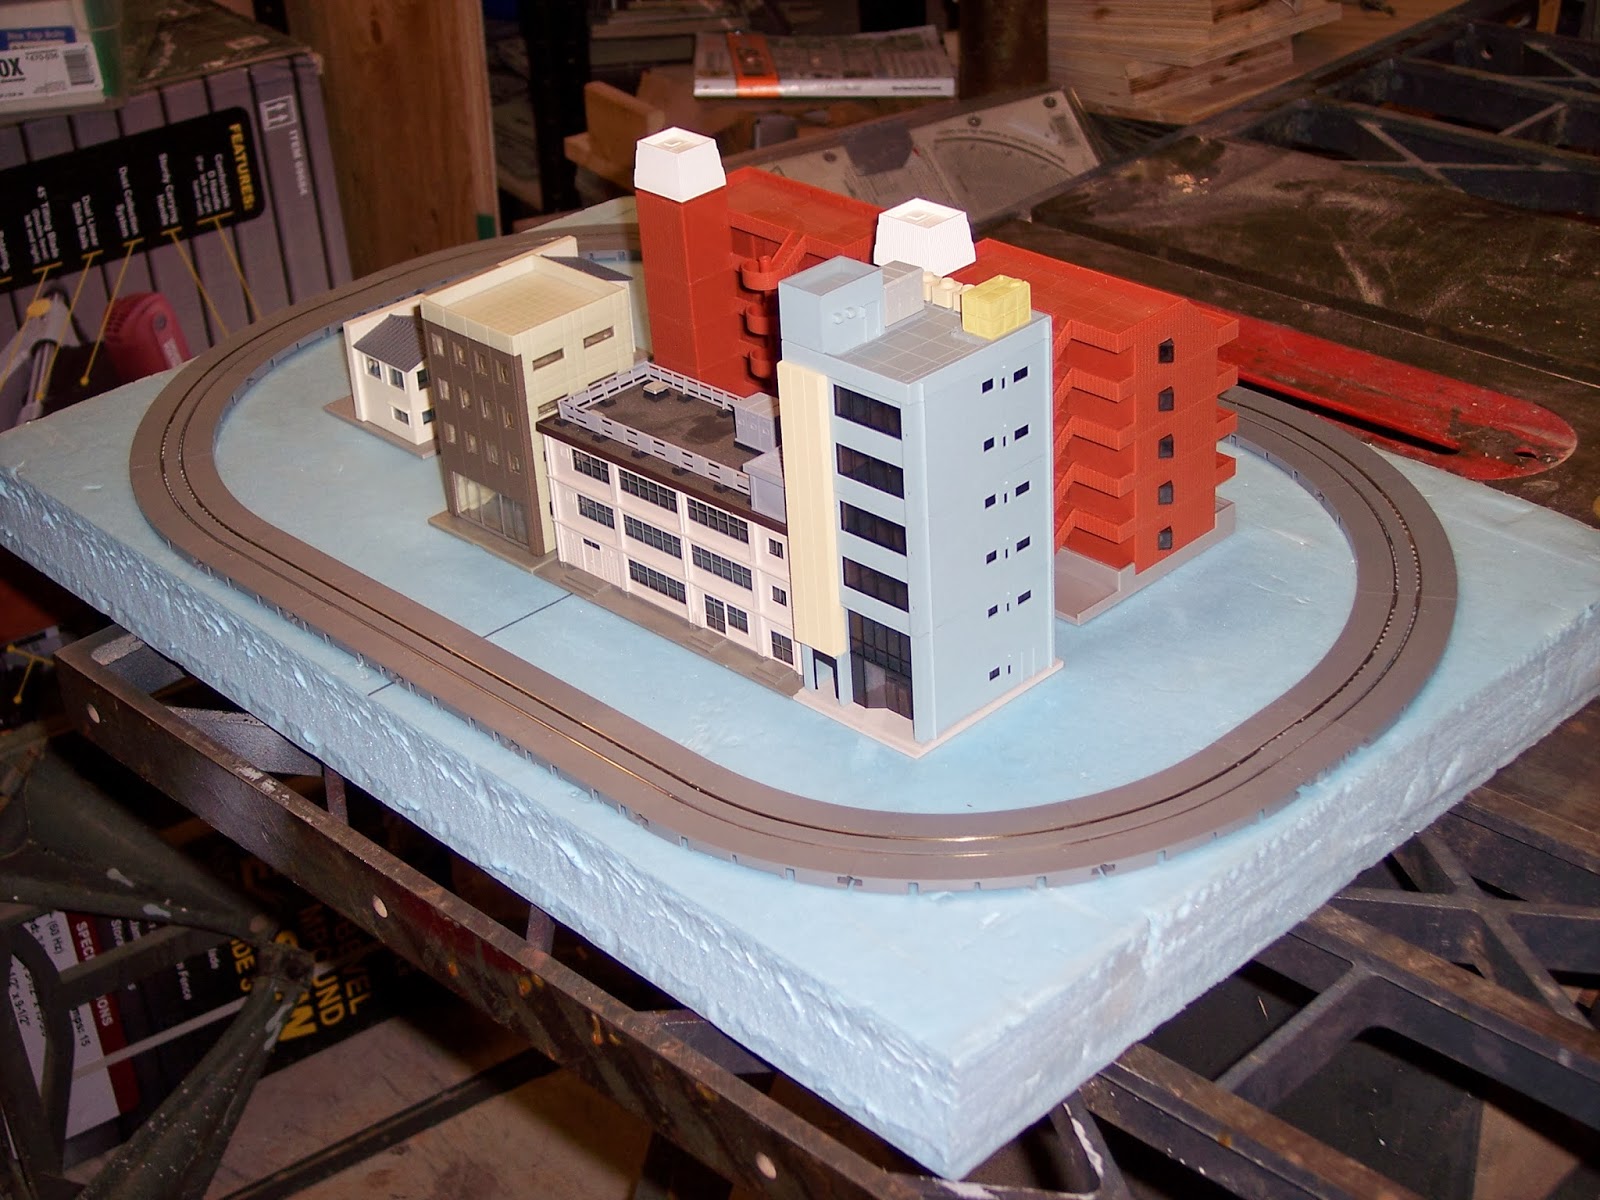
Project one: restoration and upgrading Jay Morrow's module 

Jay Morrow's module
I received this module from my deceased friend's estate.  It needs some work to make it show-able. The electrical is really in pretty good shape.  I've added some Kato pigtails to the barrier strips, and friend Joe and I confirmed that the streetlights work.  They're grain-of-wheat bulbs, and Jay had the circuit completely wired with power pole connectors. Sweet.

The track needs a little work. I need to anchor it down in a few spots and clean up some soldered leads.

While I have it on the bench I decided to convert the adjusting legs to the top-adjusting variety.  I'll clean up the dust and repair some fences, cars and streetlights, and then spruce up scenery a bit.

Project two: rolling stock maintenance and inventory.

Next ongoing project is to inventory my rolling stock and do some maintenance as needed.  Mostly I'm checking each car's weight and making sure it rolls freely. I have an inclined test track.  I remove the wheels and make sure the pockets on the truck frames are free of gunk, and liberally add graphite before re-inserting the wheels.  Some times I have to add new Mirco Trains trucks, and sometimes just new wheels.  Most of the cars are very light according to NMRA standards, so when it's practicable, I'm adding fishing weights.
Workbench showing my car maintenance area.
Current box of cars and my scale.
My supply of extra trucks and wheels.

Project three: upgrading the Amish Farm junction

My third project is a much needed upgrade to the Amish Farm junction.  Right now I'm working on a grade crossing across the two tracks and the stream between them, to connect the houses with the barns.  Plans are to add people, farm animals, wagons, carriages.  And of course, I'll add to the scenery, especially around the trestle.  There is still some bare plaster showing and the run-off stream from the pond dam needs to be added.

Amish Farm junction
There is always lots going on ...

Sunday, February 16, 2014

I've got a couple of major projects going right now.  The largest is the new Pinedale Township Ttrak layout consisting of 8 modules that will connect to form a layout on a single 30" x 72" banquet table.  I've got two more buildings to finish constructing and gluing down.  Once that is done, I'll post pics or videos to show you what it's looking like.

When I get burned out on large projects, I generally put together a smaller project that has been waiting in the wings for a while.  This weekend, it was my long planned troop and army equipment train.  Two years ago, Walgreens sold sets of small military vehicles which fit perfectly on an N-scale flat car.I bought 6 sets, and they've been sitting on the shelf until this weekend.  I decided it was time to mount them onto flat cars and create the train.

I would up with 15 loaded flat cars, and they are very heavy, so I am pulling them with a pair of Kato heavy Mikatos.

I quickly made a video of the train passing through Pinedale Township.  See it on YouTube here  http://www.youtube.com/watch?v=-kDpWmNLBFo


Tuesday, December 31, 2013

Top Adjusting modules - how to conceal the hole in the top of the module

I've been building N-Scale TTrak modules with top adjusting legs, by drilling an access hole through the top of the module, and then using 2 inch set screws rather than hex head machine screws.  This works great, except that you have this hole in the top of your module.

I recently created a new module with 8 adjusting legs (yes, it's a rather large end loop).

Here is a before and an after photo showing how I chose to conceal the holes.


You can see the 21/64" hole and the tree stump attached to a 5/16" dowel that's about 3/8" in length.  I attached the stump to the dowel with thick AC adhesive.


Here is the scene with the plug in place.  You'd never know there was anything there.


Thursday, November 14, 2013

Another look at the micro layout

Here's a link to a Youtube video of the first test-run on the micro: First Run
For a time of slowing down for the winter, it's getting busy.  We have an added show on Jan. 3-4 at the Museum of Texas Tech University.  We are participating in the "First Friday Arts Trail" in Lubbock, TX.

This is the second time for us to be a part of the Trail, and we want to put our best efforst forward to promote the hobby and attract potential new members.  More on the layout later, it's still in the planning stages.  I need to get to the shop and lay track on two new modules, as well as a Christmas gift layout for some friends at church, as well as - - - .  It just never ends!

Saturday, November 2, 2013

A "Micro" bit of an update

I've gotten a little more done on the micro. There are many, many detail items to be added, trees, shrubs, bushes, figures, the list goes on.  Here's a picture from each corner:


The power wire dongle seen in the first two pictures is a standard Tomix power feeder.  I'll need to make an adaptor to the Kato connectors on my throttles.  That's a piece of cake, but a subject for another time.  

Close ball game on, so that's it for now.

Wednesday, October 30, 2013

It's Christmas at Halloween!

What a treat! I bought a few "old, battered, un-runnable" (my intended description) hoppers from a couple of guys online.  They were slated for use as fixed scenery items on a module that "should" be finished over the winter.

Our mail lady just delivered the cars today. Oh, my, a number of them are far too good to attach like that - they will become a part of my rolling stock!  At least the others, along with a few I already have, will probably get the scene completed.

Stay tuned - pictures later!

Tuesday, October 29, 2013

My first "Micro"

I am giving the program at the next Lubbock model club meeting. The subject chosen is micro layouts.
As a part of the program, I am building a micro.  It's nothing fancy, nor will it be as detailed, at meeting time, as those seen on the excellent web page Micro/Small Layouts .  There are over 110 pages of layouts built and imagined there.  When you go, be sure you have some time to spend, savoring the variety of examples shown.

A "micro" is generally defined as four square feet or less, and can be a square, linear, or other form.  A "small" is about 24 square ft., max.  Note that there is no restriction as to scale or gauge.  One of the more impressive layouts is the Squarefoot Estate Rwy, done in G scale - Gn15.  And, it does feature a bit of operations, too!

Here's the plan for my example:


And, a couple of construction pictures:

The small buildings hidden on the left side did not make the final design.  Here's a couple of glimpses at tge construction:


I'm using Tomix Tram track, and the "ground" either side of it is built up with a layer of cork.
Lunch time, then back to the shop!