Wow, it's been a while since 10/10/2014. A lot has happened in the interim. We've moved twice, I've had several surgeries (rotator cuff, then shoulder joint replacement.)
So, here at the end of winter 2019, I'm able to get back to the trains. I now reside in Collinsville, TX, north of Dallas about 18 miles south of Oklahoma.
Contact has been made with North Texas TTrak group, and I have been in two shows since 1/1/2019. Oh, man, it felt GOOD to participate, especially with the friendly people of NTTT.
In the second show I was able to trial a new small camera, and make some N cab ride videos.
Here's the NTTT layout: https://www.youtube.com/watch?v=IJsmlrEM9E8
And, on the Tex-N layout: https://www.youtube.com/watch?v=JqARHBhgHrE
I'm hoping to finally get a semi-permanent layout set up by summer. I've been making drawings using modules I have, I must say it's looking promising. A part of it should be the CJ&K Rwy: https://www.youtube.com/watch?v=3TSlIm96Nzg
Big dreams - and if I can not fall and injure myself again, just maybe . . .
Tuesday, October 14, 2014
Home Layout Becomes two levels
The upper level for my home T-Trak layout is becoming a reality. Over last few days, I have cleaned off the existing shelf, removed the lighting and facia, removed the wire shelving, lowered the brackets 6 inches and mounted the plywood. Below are some progress photos.
The result is two 16-foot shelves. I still have to add facia and lighting and sky boards. Stay tuned for a future blog post. These photos show the final result of tonight's work.


Next up, facia and lighting.
 |
| Facia, lights and wire shelves have been removed. The sky boards are just laying forward protecting the modules beneath them. I had to purchase a couple more shelf standards in order to lower the brackets. |
 |
| In order to mount the plywood securely to the shop walls, I mounted 2 x 2 's to the wall, using the level to make sure they were at the same height as the shelf brackets. I then screwed the plywood down to the 2 x 2 's from the top. |
 |
| After both pieces were secured to the wall, I added a plywood splice to reinforce and level the joint. After clamping in place, I used eight 2" flat head screws to make an absolutely solid joint. |
Next up, facia and lighting.


Monday, October 13, 2014
Since the last post, I've been slowly working on the paper mock ups of the structures. To do this, the laser cut panels of the building kit are copied. This way, I have reasonably accurate buildings when done. I'm not putting much time in on each one, just enough to cut and tape the mock-up for size and placing each on the layout. So far, I'm about one-third done. Here's some snaps of how it's working:


This is the west end of Tomix Crossing.On the far end loop are some some company houses from AMB, three to a box. I'll probably need a few more of some sort here.
The next module is a 1x with a loop on the inner track. Currently, there are six (two packages) of Grandt Line Reese Street houses. Both of these modules represent a poorer area of town, and will need detailing to suit.
The next module is a 2x, and has a Bachmann 1930's school (long discontinued, I think. I was lucky to find this one.) It has no roof, but that's fine. I can see the space it'll need. There will be some playground equipment behind it. Also, a business building is to be placed. Behind it I'm considered a couple of buildings (the yellow boxes) between the tram loop and the main tracks. It may prove to be a bit too tight. If so, I can adjust the tram loop size a little bit.
Moving on to the second 2x module, we find the county courthouse (from Woodland Scenics) and a small, old style hotel. Somewhere in there should wind up holding a service station from Micro Engineering. At the front, there is a small station structure, laying in its package.
Next to see is the wye, with the tail crossing the main lines. The turnouts and trackage is all Tomix, hence the name. It fits nicely on the double-deep module. Not really creative, but at least it serves as a "project code name" until when or if another one is chosen. Across the tail track is a country church from Osborn Models. Also, two or three middle-income houses will fit here. Shown is one of them, with the copy of the main pieces ready for cutting and taping. By the way, for those who worry about such, the wye turnout is properly insulated for reverse wiring. I plan on installing a reverser under here on a permanent basis.
From there, we cross onto the next space, another 1x module. The row house kit shown is one of two to populate the space. The six houses will form a compact neighborhood.
The sixth (and final) module is barely shown. I'm really not sure what will go there, but there are two worthy candidates lurking in the project pile. We'll see what develops. For now, I think I'll close this blurb with an overlook of the layout.
Friday, October 3, 2014
My workbench has been evicted to make room for a home layout (Yea! At last!) so, no workbench picture. However, at the end there's a link to a short video of the new layout.
The layout of made of double-deep TTrak modules, covering both sides of the usual table. It's a conventional double-track loop, with a couple of small deviations. First, a wye connection is made on the inner loop, crossing both loops on the other side and being available for expansion. Yes, I've done an expansion connection on another module. So, that's a real probability. It could be an industrial park, or perhaps a flavor of something like FreeMo-N. Exactly what remains for the foggy, foggy future.
The other deviation is an inner loop of Tomix Wide Tram track, and is featured on the video. The whole layout is to be a town, so the tram track is fitting. The trams to be used are not the modern Tomix light rail unit shown but something more 1930-ish from Kato, the 14-070 Hiroshima Hannover Tram units. The design dates from the late 1920's. Live overhead, we'll see, and maybe DCC in there, too. Looong term dreams.
There are going to be some tight spaces for structures, so I'm making paper mockups of them to test the fit. Hopefully, nothing too drastic.
https://www.youtube.com/watch?v=jhE5DNOdoYo&feature=youtu.be
The layout of made of double-deep TTrak modules, covering both sides of the usual table. It's a conventional double-track loop, with a couple of small deviations. First, a wye connection is made on the inner loop, crossing both loops on the other side and being available for expansion. Yes, I've done an expansion connection on another module. So, that's a real probability. It could be an industrial park, or perhaps a flavor of something like FreeMo-N. Exactly what remains for the foggy, foggy future.
The other deviation is an inner loop of Tomix Wide Tram track, and is featured on the video. The whole layout is to be a town, so the tram track is fitting. The trams to be used are not the modern Tomix light rail unit shown but something more 1930-ish from Kato, the 14-070 Hiroshima Hannover Tram units. The design dates from the late 1920's. Live overhead, we'll see, and maybe DCC in there, too. Looong term dreams.
There are going to be some tight spaces for structures, so I'm making paper mockups of them to test the fit. Hopefully, nothing too drastic.
https://www.youtube.com/watch?v=jhE5DNOdoYo&feature=youtu.be
Friday, September 26, 2014
My shop on 9/23/2014
I decided to take a few photos of my shop weekly just to track my projects and progress (if any) I'm making on them.
I have three projects going on right now.
The track needs a little work. I need to anchor it down in a few spots and clean up some soldered leads.
While I have it on the bench I decided to convert the adjusting legs to the top-adjusting variety. I'll clean up the dust and repair some fences, cars and streetlights, and then spruce up scenery a bit.
There is always lots going on ...
I have three projects going on right now.
Project one: restoration and upgrading Jay Morrow's module
 |
| Jay Morrow's module |
I received this module from my deceased friend's estate. It needs some work to make it show-able. The electrical is really in pretty good shape. I've added some Kato pigtails to the barrier strips, and friend Joe and I confirmed that the streetlights work. They're grain-of-wheat bulbs, and Jay had the circuit completely wired with power pole connectors. Sweet.
The track needs a little work. I need to anchor it down in a few spots and clean up some soldered leads.
While I have it on the bench I decided to convert the adjusting legs to the top-adjusting variety. I'll clean up the dust and repair some fences, cars and streetlights, and then spruce up scenery a bit.
Project two: rolling stock maintenance and inventory.
Next ongoing project is to inventory my rolling stock and do some maintenance as needed. Mostly I'm checking each car's weight and making sure it rolls freely. I have an inclined test track. I remove the wheels and make sure the pockets on the truck frames are free of gunk, and liberally add graphite before re-inserting the wheels. Some times I have to add new Mirco Trains trucks, and sometimes just new wheels. Most of the cars are very light according to NMRA standards, so when it's practicable, I'm adding fishing weights. |
| Workbench showing my car maintenance area. |
 |
| Current box of cars and my scale. |
 |
| My supply of extra trucks and wheels. |
Project three: upgrading the Amish Farm junction
My third project is a much needed upgrade to the Amish Farm junction. Right now I'm working on a grade crossing across the two tracks and the stream between them, to connect the houses with the barns. Plans are to add people, farm animals, wagons, carriages. And of course, I'll add to the scenery, especially around the trestle. There is still some bare plaster showing and the run-off stream from the pond dam needs to be added. |
| Amish Farm junction |
Sunday, February 16, 2014
I've got a couple of major projects going right now. The largest is the new Pinedale Township Ttrak layout consisting of 8 modules that will connect to form a layout on a single 30" x 72" banquet table. I've got two more buildings to finish constructing and gluing down. Once that is done, I'll post pics or videos to show you what it's looking like.
When I get burned out on large projects, I generally put together a smaller project that has been waiting in the wings for a while. This weekend, it was my long planned troop and army equipment train. Two years ago, Walgreens sold sets of small military vehicles which fit perfectly on an N-scale flat car.I bought 6 sets, and they've been sitting on the shelf until this weekend. I decided it was time to mount them onto flat cars and create the train.
I would up with 15 loaded flat cars, and they are very heavy, so I am pulling them with a pair of Kato heavy Mikatos.
I quickly made a video of the train passing through Pinedale Township. See it on YouTube here http://www.youtube.com/watch?v=-kDpWmNLBFo
When I get burned out on large projects, I generally put together a smaller project that has been waiting in the wings for a while. This weekend, it was my long planned troop and army equipment train. Two years ago, Walgreens sold sets of small military vehicles which fit perfectly on an N-scale flat car.I bought 6 sets, and they've been sitting on the shelf until this weekend. I decided it was time to mount them onto flat cars and create the train.
I would up with 15 loaded flat cars, and they are very heavy, so I am pulling them with a pair of Kato heavy Mikatos.
I quickly made a video of the train passing through Pinedale Township. See it on YouTube here http://www.youtube.com/watch?v=-kDpWmNLBFo
Tuesday, December 31, 2013
Top Adjusting modules - how to conceal the hole in the top of the module
I've been building N-Scale TTrak modules with top adjusting legs, by drilling an access hole through the top of the module, and then using 2 inch set screws rather than hex head machine screws. This works great, except that you have this hole in the top of your module.
I recently created a new module with 8 adjusting legs (yes, it's a rather large end loop).
Here is a before and an after photo showing how I chose to conceal the holes.


I recently created a new module with 8 adjusting legs (yes, it's a rather large end loop).
Here is a before and an after photo showing how I chose to conceal the holes.

You can see the 21/64" hole and the tree stump attached to a 5/16" dowel that's about 3/8" in length. I attached the stump to the dowel with thick AC adhesive.

Here is the scene with the plug in place. You'd never know there was anything there.
Thursday, November 14, 2013
Another look at the micro layout
Here's a link to a Youtube video of the first test-run on the micro: First Run
For a time of slowing down for the winter, it's getting busy. We have an added show on Jan. 3-4 at the Museum of Texas Tech University. We are participating in the "First Friday Arts Trail" in Lubbock, TX.
This is the second time for us to be a part of the Trail, and we want to put our best efforst forward to promote the hobby and attract potential new members. More on the layout later, it's still in the planning stages. I need to get to the shop and lay track on two new modules, as well as a Christmas gift layout for some friends at church, as well as - - - . It just never ends!
For a time of slowing down for the winter, it's getting busy. We have an added show on Jan. 3-4 at the Museum of Texas Tech University. We are participating in the "First Friday Arts Trail" in Lubbock, TX.
This is the second time for us to be a part of the Trail, and we want to put our best efforst forward to promote the hobby and attract potential new members. More on the layout later, it's still in the planning stages. I need to get to the shop and lay track on two new modules, as well as a Christmas gift layout for some friends at church, as well as - - - . It just never ends!
Saturday, November 2, 2013
A "Micro" bit of an update
I've gotten a little more done on the micro. There are many, many detail items to be added, trees, shrubs, bushes, figures, the list goes on. Here's a picture from each corner:


The power wire dongle seen in the first two pictures is a standard Tomix power feeder. I'll need to make an adaptor to the Kato connectors on my throttles. That's a piece of cake, but a subject for another time.
Close ball game on, so that's it for now.
Wednesday, October 30, 2013
It's Christmas at Halloween!
What a treat! I bought a few "old, battered, un-runnable" (my intended description) hoppers from a couple of guys online. They were slated for use as fixed scenery items on a module that "should" be finished over the winter.
Our mail lady just delivered the cars today. Oh, my, a number of them are far too good to attach like that - they will become a part of my rolling stock! At least the others, along with a few I already have, will probably get the scene completed.
Stay tuned - pictures later!
Our mail lady just delivered the cars today. Oh, my, a number of them are far too good to attach like that - they will become a part of my rolling stock! At least the others, along with a few I already have, will probably get the scene completed.
Stay tuned - pictures later!
Tuesday, October 29, 2013
My first "Micro"
I am giving the program at the next Lubbock model club meeting. The subject chosen is micro layouts.
As a part of the program, I am building a micro. It's nothing fancy, nor will it be as detailed, at meeting time, as those seen on the excellent web page Micro/Small Layouts . There are over 110 pages of layouts built and imagined there. When you go, be sure you have some time to spend, savoring the variety of examples shown.
A "micro" is generally defined as four square feet or less, and can be a square, linear, or other form. A "small" is about 24 square ft., max. Note that there is no restriction as to scale or gauge. One of the more impressive layouts is the Squarefoot Estate Rwy, done in G scale - Gn15. And, it does feature a bit of operations, too!
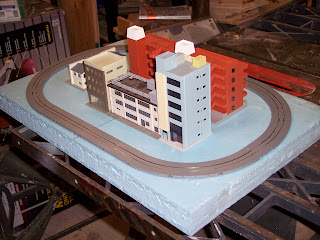
Here's the plan for my example:

And, a couple of construction pictures:


As a part of the program, I am building a micro. It's nothing fancy, nor will it be as detailed, at meeting time, as those seen on the excellent web page Micro/Small Layouts . There are over 110 pages of layouts built and imagined there. When you go, be sure you have some time to spend, savoring the variety of examples shown.
A "micro" is generally defined as four square feet or less, and can be a square, linear, or other form. A "small" is about 24 square ft., max. Note that there is no restriction as to scale or gauge. One of the more impressive layouts is the Squarefoot Estate Rwy, done in G scale - Gn15. And, it does feature a bit of operations, too!
Here's the plan for my example:

And, a couple of construction pictures:
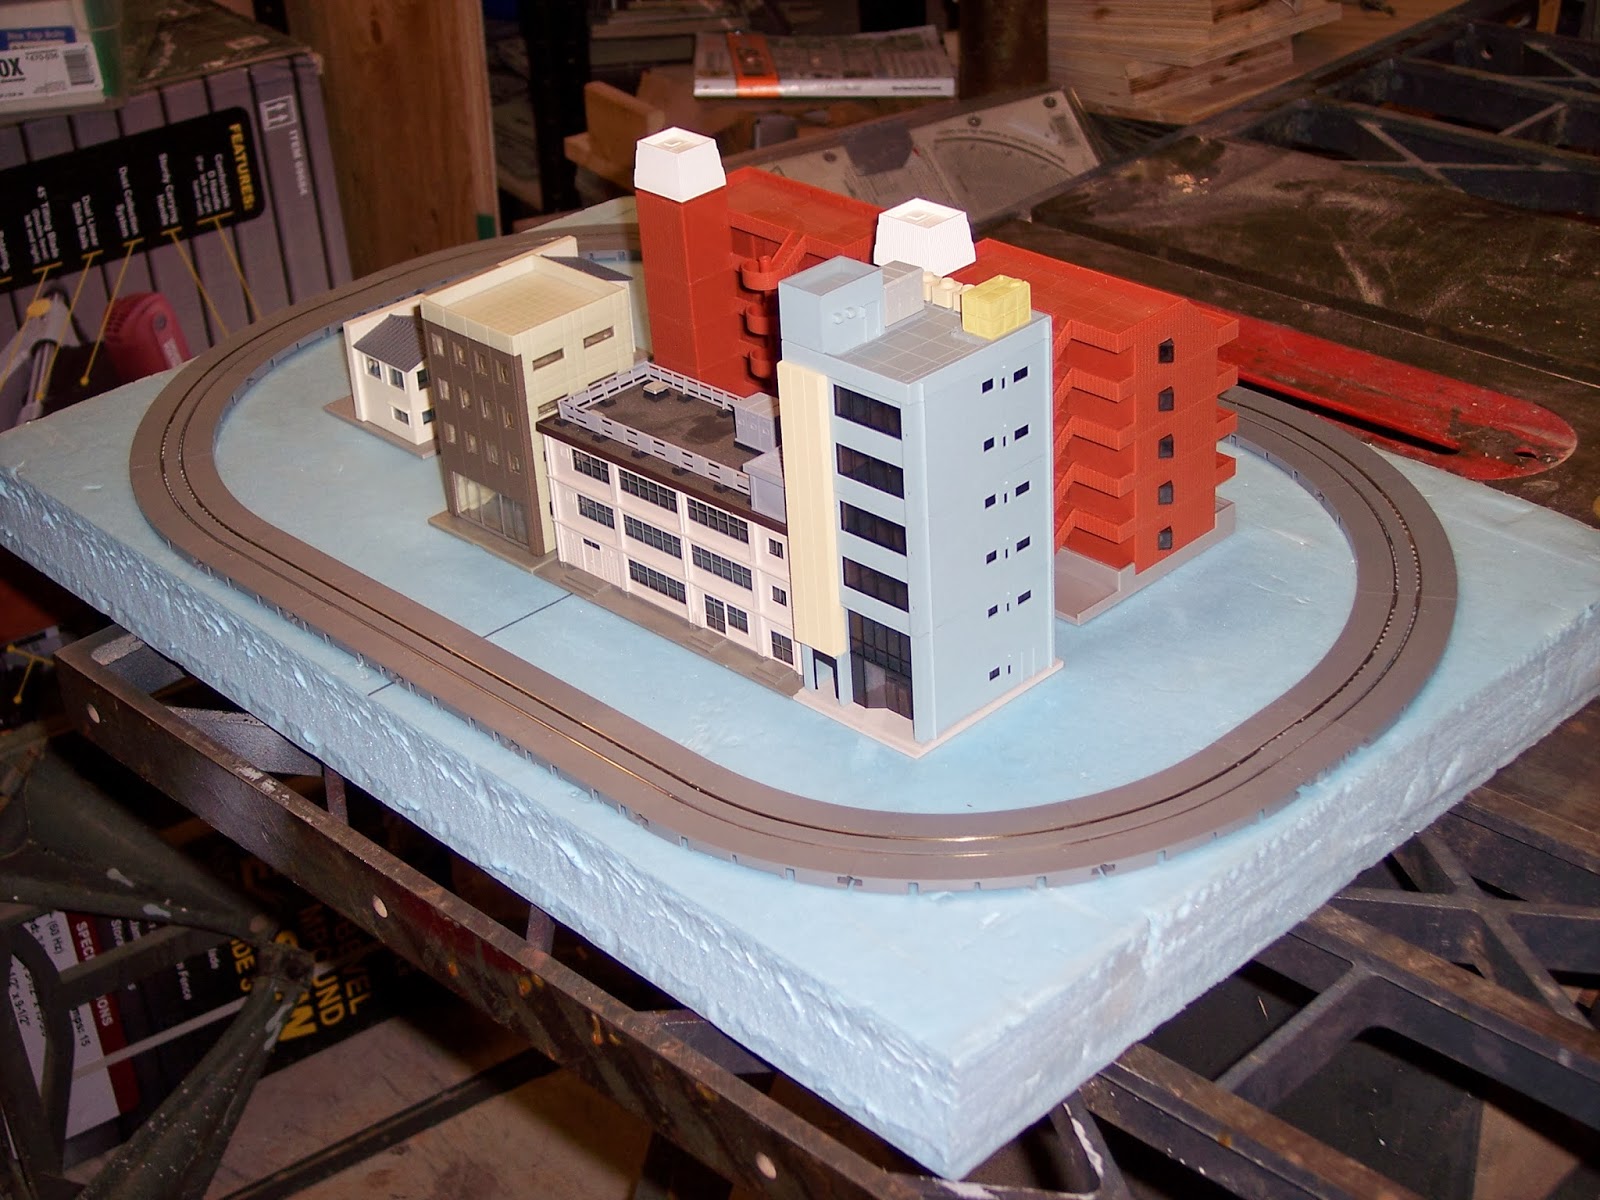
The small buildings hidden on the left side did not make the final design. Here's a couple of glimpses at tge construction:


I'm using Tomix Tram track, and the "ground" either side of it is built up with a layer of cork.
Lunch time, then back to the shop!
Back to elementary school - - -
On October 25, I did a small train show.This year makes the fourth time I've been invited to give a 1/2-day train show at an area elementary school. The teachers tie it in with the students (it's hard to think of 5-yr. olds as "students!") starting to learn about transportation.
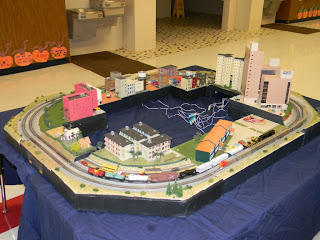
This year, six classes, with a total of 131 kids, were shown a small N-scale layout. It was so much fun to see their bright eyes, big smiles, and excited voices. I am well paid, indeed.
The layout was arranged in a square manner. It was a bit crowded around the tables as the classes came out, one class at a time. Next year I'll have to plan a layout with more "edge space" to lessen the crowding.
Here's a few pictures. The kids are not shown for obvious reasons.


This year, six classes, with a total of 131 kids, were shown a small N-scale layout. It was so much fun to see their bright eyes, big smiles, and excited voices. I am well paid, indeed.
The layout was arranged in a square manner. It was a bit crowded around the tables as the classes came out, one class at a time. Next year I'll have to plan a layout with more "edge space" to lessen the crowding.
Here's a few pictures. The kids are not shown for obvious reasons.


A hit with them was the "fainting man." Back in a recessed area, a figure had fallen over.
The kids were concerned about him, deciding that a figure in (almost) white was a nurse going to check on him. Also, the emergency helicopter (it's on the layout) was coming to get him.

After all that ecxitment, I will have to go back and glue him down, permanently. Thanks, kids!
Friday, October 25, 2013
Finally, My First "Permanent" Home Layout
Like Joe, it's been too long since I posted anything. My latest project has been to construct a semi-permanent shelf in the shop where I can assemble modules and be able to run trains at home.
Sorry I didn't take any construction photos. It's pretty basic stuff. I already had a wall of adjustable shelving, so I decided to go with that. I lowered the shelf standards to match the height of my table saw out-feed table. Before too long I will no longer need it as I transition from module builder to train player.
Next I bought a sheet of 1/2" CDX plywood. I just barely had room at one end to put up a shelf for an end loop consisting of three alt-corners, two double straights and a junction. That piece of shelf ended up being about 54" x 30", held in the corner by 1 x 2 strips attached to the wall corners, and a 4 x 4 post holding it up under the corner in the room.
Then down the wall, I cut the remainder of the plywood in 18" wide sections, and layed them on the shelf standards. Trying to avoid excess cost, I added splicer boards along the way. I ended up with an 24' x 30' piece at the far end, under the return loop. I just added a leg brace and more 1 x 2 strips on the wal to hold that end in place.
Using shop scraps, I added facia top and bottom with 1 x 2 's and added 1/8" masonite over that to create a nice clean look. You really cannot tell that is is mostly just a hunk of plywood sitting on shelf brackets.
I decided that I needed some lighting for the layout. I found some 24" mini-fluorescents at Home Depot that can be daisy-chained with just one plug-in. I ended up with 7 of them, and mounted them up under the top valence, completely hidden from view.
Next step was to create some type of skyboard to cover up the ugly wafer-board walls and to keep the light from heading up to the ceiling through the wire shelves above the layout. Hobby Lobby matting board to the rescue. I got the last 5 pieces of a nice sky blue and just wedged them in place at the top and stabled them to cleats along the wall just above the shelf. '
It was a very inexpensive, quick and easy project that took me a total of about two weeks, working just in the evenings.
It has allowed me to assemble about 1.75 scale miles of track in a continuous run loop, where I can FINALLY run my own trains at home, without having to wait for a show.
You can view the first run of a train over the layout at this youTube video: http://youtu.be/d3RFmXmTDxk
Sorry I didn't take any construction photos. It's pretty basic stuff. I already had a wall of adjustable shelving, so I decided to go with that. I lowered the shelf standards to match the height of my table saw out-feed table. Before too long I will no longer need it as I transition from module builder to train player.
Next I bought a sheet of 1/2" CDX plywood. I just barely had room at one end to put up a shelf for an end loop consisting of three alt-corners, two double straights and a junction. That piece of shelf ended up being about 54" x 30", held in the corner by 1 x 2 strips attached to the wall corners, and a 4 x 4 post holding it up under the corner in the room.
Then down the wall, I cut the remainder of the plywood in 18" wide sections, and layed them on the shelf standards. Trying to avoid excess cost, I added splicer boards along the way. I ended up with an 24' x 30' piece at the far end, under the return loop. I just added a leg brace and more 1 x 2 strips on the wal to hold that end in place.
Using shop scraps, I added facia top and bottom with 1 x 2 's and added 1/8" masonite over that to create a nice clean look. You really cannot tell that is is mostly just a hunk of plywood sitting on shelf brackets.
I decided that I needed some lighting for the layout. I found some 24" mini-fluorescents at Home Depot that can be daisy-chained with just one plug-in. I ended up with 7 of them, and mounted them up under the top valence, completely hidden from view.
Next step was to create some type of skyboard to cover up the ugly wafer-board walls and to keep the light from heading up to the ceiling through the wire shelves above the layout. Hobby Lobby matting board to the rescue. I got the last 5 pieces of a nice sky blue and just wedged them in place at the top and stabled them to cleats along the wall just above the shelf. '
It was a very inexpensive, quick and easy project that took me a total of about two weeks, working just in the evenings.
It has allowed me to assemble about 1.75 scale miles of track in a continuous run loop, where I can FINALLY run my own trains at home, without having to wait for a show.
You can view the first run of a train over the layout at this youTube video: http://youtu.be/d3RFmXmTDxk
Monday, October 21, 2013
Wolfforth Library Show, October 18-19, 2013
It's been a while - - -
Far too long since my last post. I am setting a goal of making posts regularly, and certainly more often.
As for this post, the group just finished a 2-day show at the Wolfforth Public Library. It was a good show. The turnout was light, but those who did come seemed to enjoy the layout of about 42 modules.
We seem to be getting better with the setup. Several long trains (ATSF Super Chief, 4 engines and 12 cars) ran for hours without intervention. No stalling, no derails, no random uncouplings. It was a smooth running layout.
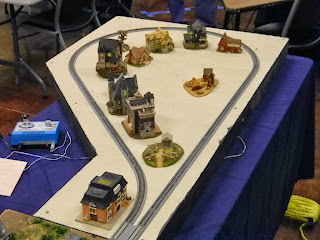
Here's a few pictures from the show, primarily new modules from KenW and Frankie A:


Far too long since my last post. I am setting a goal of making posts regularly, and certainly more often.
As for this post, the group just finished a 2-day show at the Wolfforth Public Library. It was a good show. The turnout was light, but those who did come seemed to enjoy the layout of about 42 modules.
We seem to be getting better with the setup. Several long trains (ATSF Super Chief, 4 engines and 12 cars) ran for hours without intervention. No stalling, no derails, no random uncouplings. It was a smooth running layout.
Here's a few pictures from the show, primarily new modules from KenW and Frankie A:


And a few other modules as well:


That's about all from me. Maybe some others will jump in with a comment or picture as they saw the show.
Friday, September 16, 2011
The Quadopus Takes Form
It's not finished, but I'm making progress on a box for my DCC
system. It has a Digitrax DCS200 command station and, hidden
underneath, a PM42 power monitor card that provides outputs
for four separate power districts via the blue/white Power Pole
connectors. Two connections for the Loconet cables are also
available for the throttle connections.
The lid will mount on lift-off hinges, so there is no danger of it
slamming shut while in operation, damaging cables.
Not real pretty, but the 3/4" plywood should make it very
sturdy for portable use at shows.


Sunday, July 17, 2011
July 17 - I started the assembly of the new power cables to use with the Digitrax DCC system we (BJ and I) are starting to learn. With help from various people "out there," I made a drawing of the cables and connectors to help get everything straight in the mind before starting the assembly. And, here's a couple of pix of my first (short) cables. A number of long (~8'3") cables are under construction, almost finished. All will have a Kato compatible drop. I call this the 'away' end, as in 'away from the Cmd Stn.'
We (BJ mainly, and I) are looking into easy to apply mid-span taps. More on that later, after our Aug. 12-13 show.
I spent a lot of time looking at the housings and contact pins, and finally was able to 'think through' the issues, including pin orientation while crimping, before starting.
There will be two versions of the Cmd Stn pigtail. One is straight to the Power Pole connectors, and the other is through a PM42 Pwr Mgr card, with four fan-outs.
In addition, there are three special 2' long cables. These have Kato triple blocks on them rather than the single connector. The Rattlesnake Junction module requires additional connections for all the tracks, so these were created to fulfill that need.
Joe
20110713-3, 20110717-1


We (BJ mainly, and I) are looking into easy to apply mid-span taps. More on that later, after our Aug. 12-13 show.
I spent a lot of time looking at the housings and contact pins, and finally was able to 'think through' the issues, including pin orientation while crimping, before starting.
There will be two versions of the Cmd Stn pigtail. One is straight to the Power Pole connectors, and the other is through a PM42 Pwr Mgr card, with four fan-outs.
In addition, there are three special 2' long cables. These have Kato triple blocks on them rather than the single connector. The Rattlesnake Junction module requires additional connections for all the tracks, so these were created to fulfill that need.
Joe
20110713-3, 20110717-1


July 7 - I got a bit more done on the new Payne Boxes this morning. These two are the final ones until after the Wolfforth Library show in August.
Unlike the previous box, these have only one shelf in them. However, the shelf is divided, so a box holds three modules. Only one shelf is used to allow for taller scenery and structures in it.
The pictures should make this need a bit evident.
Two things to note: First, the shelf positions are not the same. These positions were determined by the overall height of the sceniced modules on the upper layer. Second, the junction module in the bottom of each box is a bit narrower than the two corners above it. This results in a 5" x 18" open space at one end of the Payne Box. A project for that space has "announced itself" to me. All I have to say about that at this time is "stay tuned."
I still need to cut the hand holes in the top of each end, but that is an easy task. The final item to attach is the front panel. I'm considering hinging it at the top or splitting it vertically and hinging from the sides as doors. Decisions, decisions, decisions . . .
Joe


Unlike the previous box, these have only one shelf in them. However, the shelf is divided, so a box holds three modules. Only one shelf is used to allow for taller scenery and structures in it.
The pictures should make this need a bit evident.
Two things to note: First, the shelf positions are not the same. These positions were determined by the overall height of the sceniced modules on the upper layer. Second, the junction module in the bottom of each box is a bit narrower than the two corners above it. This results in a 5" x 18" open space at one end of the Payne Box. A project for that space has "announced itself" to me. All I have to say about that at this time is "stay tuned."
I still need to cut the hand holes in the top of each end, but that is an easy task. The final item to attach is the front panel. I'm considering hinging it at the top or splitting it vertically and hinging from the sides as doors. Decisions, decisions, decisions . . .
Joe


July 4 - It was a bit cooler this morning, so I got a good session in the shop before starting to overheat.
I built my first new generation Payne Box. Almost everything had to be cut today. The front, rear and sides were cross-cut pre-cut to the desired 29" height by the big box store. They are cheap 5mm paneling, but plenty good for this app.
The ~11/16" sq. strips everywhere were ripped from a pair of 2x4's to start the day. Then, based on the dimensions of the modules +~3/8" or so, four strips and four pieces of paneling from another sheet (the bottom of each layer and the top) were cut to size to form shelves. The module nestles down inside the strip frame. The front, rear and sides were cut to width. Then, assembly started.
Really, it went together well. With the sides glued and bradded to the shelves and top, I layed the back on the assembly to check for square. By far, this is the most square thing I have ever built. Maybe I am improving? Ha!
So, the back was glued and bradded in place. All that remains is to attach the door on the front once I get the hardware. Now, the modules will have a home with protection from dust, etc. and security whilst being transported. There are several more Payne Boxes to do, and each is a custom fit to the modules involved, but the basic design is constant.
Why 29" high, you ask? Well, BJ (another module builder here) realized that these table-top modules sit on banquet tables that are 29" high. So, if the Payne Boxes are 29" tall, they can serve as auxiliary tables for shows.
I'm tired, it's time to visit Mr. Zzzzzzzzzzzzzz - - -
Joe


I built my first new generation Payne Box. Almost everything had to be cut today. The front, rear and sides were cross-cut pre-cut to the desired 29" height by the big box store. They are cheap 5mm paneling, but plenty good for this app.
The ~11/16" sq. strips everywhere were ripped from a pair of 2x4's to start the day. Then, based on the dimensions of the modules +~3/8" or so, four strips and four pieces of paneling from another sheet (the bottom of each layer and the top) were cut to size to form shelves. The module nestles down inside the strip frame. The front, rear and sides were cut to width. Then, assembly started.
Really, it went together well. With the sides glued and bradded to the shelves and top, I layed the back on the assembly to check for square. By far, this is the most square thing I have ever built. Maybe I am improving? Ha!
So, the back was glued and bradded in place. All that remains is to attach the door on the front once I get the hardware. Now, the modules will have a home with protection from dust, etc. and security whilst being transported. There are several more Payne Boxes to do, and each is a custom fit to the modules involved, but the basic design is constant.
Why 29" high, you ask? Well, BJ (another module builder here) realized that these table-top modules sit on banquet tables that are 29" high. So, if the Payne Boxes are 29" tall, they can serve as auxiliary tables for shows.
I'm tired, it's time to visit Mr. Zzzzzzzzzzzzzz - - -
Joe


Thursday, June 16, 2011
Progress ... always progress is being made by some of us
It's hard to believe that it's been a month since the last blog entry. Let me see if I can catch everyone up on what's been going on. If I miss something, feel free to add to this or let me know and I'll let everyone know.
First (and foremost), Lubbock Model Railroad Association hosted the NMRA's Lone Star Region annual conference here in Lubbock at the Holiday Inn. All of us SouthWest Trakers were heavily involved. Darrell manned the "Company Store", selling decals, calendars, books, and other LSR conference memorabilia
Jay kept close eye on the registration check-in table and ran errands as needed. Frankie helped out where ever she was needed at the time, usually the check-in table or the raffle table. Bob spent the entire four days manning the contest room. BJ was registrar and main check-in guy. By Friday, we had turned into a help desk and general information table.
We all had a great time hanging out and visiting and getting to know each other even better than we did before. Lunches were a good time of fellowship.
Joe? Well, he had duties in Dallas during the days of the conference, but he spent plenty of time prior to the conference scheduling clinics. His wide corners are coming together in a very impressive fashion. they've been in progress for a while, but will be available for display soon. I guess these will bring our inventory of showable modules up close to 60. He has also been busy reorganizing his shop space lately.
Speaking of clinics, I manage to break away from the registration desk to take in a couple of clinics. We all got to attend a few clinics.
Beyond the LSR clinic we have all been busy. I have spend several weeks building storage and transport Payne Boxes for the 12 modules I currently have under construction. Whew, that was a chore. The shop is a mess, but now I can get on with actual modeling. Darrell has developed a method to create stucco walls as part of his "Scratch Building on a Budget" series. Speaking of scratch building, did I mention that our very own Darrell won a first place blue ribbon in the LSR contest for his Alamo module.
Frankie has completed her first T-Trak module. It looks great and we'll try to get some photos soon.
Jay, well, Jay need over 100 turnouts for his planned home layout, so he's been busy learning how to scratch build his own. He gets better with each one he builds. They are really looking good.
Our next show will be at the Wolfforth Library the third week of August. More details will be posted here as they become known.
First (and foremost), Lubbock Model Railroad Association hosted the NMRA's Lone Star Region annual conference here in Lubbock at the Holiday Inn. All of us SouthWest Trakers were heavily involved. Darrell manned the "Company Store", selling decals, calendars, books, and other LSR conference memorabilia
Jay kept close eye on the registration check-in table and ran errands as needed. Frankie helped out where ever she was needed at the time, usually the check-in table or the raffle table. Bob spent the entire four days manning the contest room. BJ was registrar and main check-in guy. By Friday, we had turned into a help desk and general information table.
We all had a great time hanging out and visiting and getting to know each other even better than we did before. Lunches were a good time of fellowship.
Joe? Well, he had duties in Dallas during the days of the conference, but he spent plenty of time prior to the conference scheduling clinics. His wide corners are coming together in a very impressive fashion. they've been in progress for a while, but will be available for display soon. I guess these will bring our inventory of showable modules up close to 60. He has also been busy reorganizing his shop space lately.
Speaking of clinics, I manage to break away from the registration desk to take in a couple of clinics. We all got to attend a few clinics.
Beyond the LSR clinic we have all been busy. I have spend several weeks building storage and transport Payne Boxes for the 12 modules I currently have under construction. Whew, that was a chore. The shop is a mess, but now I can get on with actual modeling. Darrell has developed a method to create stucco walls as part of his "Scratch Building on a Budget" series. Speaking of scratch building, did I mention that our very own Darrell won a first place blue ribbon in the LSR contest for his Alamo module.
Frankie has completed her first T-Trak module. It looks great and we'll try to get some photos soon.
Jay, well, Jay need over 100 turnouts for his planned home layout, so he's been busy learning how to scratch build his own. He gets better with each one he builds. They are really looking good.
Our next show will be at the Wolfforth Library the third week of August. More details will be posted here as they become known.
Saturday, May 14, 2011
Good baby steps
The DCC system and I are becoming better acquainted. Over the past two days,
I have re-addressed five locos, and they are now show-ready. There is soooo
much to learn!
These locos are:
1) N&W #165 - F-M Train Master - Atlas 49639
2) NH #598 - F-M H16-44 - Atlas 52106
3) NMRR #108 - F59PHI - Athearn 23709
4) ATSF #3515 - GP-38 w/blue cab - Atlas 53454
5) ATSF #3520 - GP-38 w/yellow cab - Atlas 49873
In addition, there are numerous others, some "decoder ready," some not but
potentially convertable, and some (mainly steam) that will never see a decoder.
Subscribe to:
Posts (Atom)